Installing Arch Linux with a minimal desktop
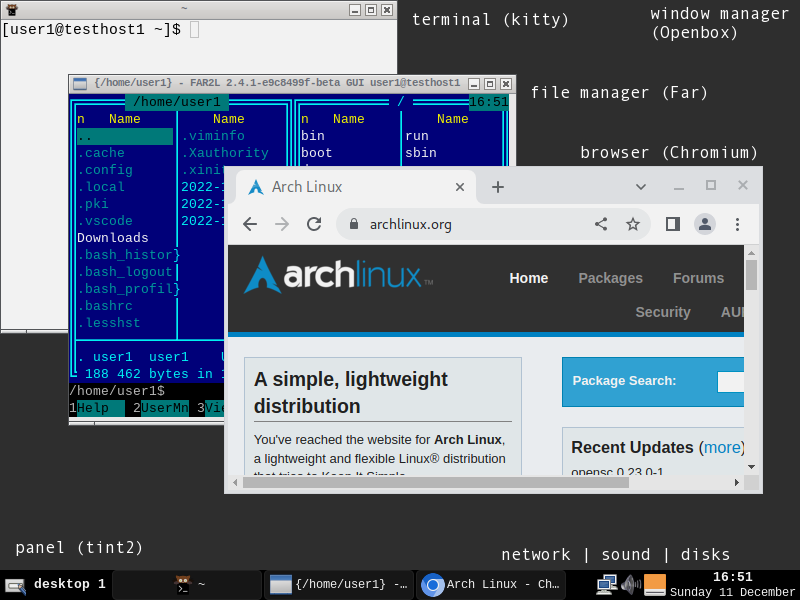
This is how I install Arch Linux with a minimal graphical environment - Openbox as a window manager, tint2 as panel, and some tray icons (network, sound and removable disk devices).
This is not a complete guide about how to install Arch Linux - refer to the official documentation instead: https://wiki.archlinux.org/title/installation_guide
Wired network connection using DHCP is required.
The configuration is really minimal - e.g. it uses a legacy boot system, single partition, no swap, no disk encryption.
General notes
- use e.g.
vimto edit files:- save:
Esc:w - exit:
Esc:q - edit text:
Esci - delete line:
Escdd - search:
Esc/<text>Enter - copy:
Escv<select using arrow keys>y - paste:
Escp
- save:
- take care about what to run as root and what as a normal user:
- we execute as root:
- the whole install sequence running from the installation USB device
- commands denoted here by starting
# pacmansystemctl- file changes in
/etc
- we execute as a regular user:
- commands denoted here by starting
$ startxyay- file changes in
~/- we won’t change any files in the root’s home directory
- commands denoted here by starting
- use
suto login as root if needed - after installation, we can use the
CTRL+ALT+F1terminal for the normal user andCTRL+ALT+F2for root
- we execute as root:
Create a bootable USB device
- go to the download page: https://archlinux.org/download/
- use e.g. some of the HTTP Direct Downloads
- download the ISO image, e.g.
archlinux-2022.12.01-x86_64.iso - note the SHA256 checksum in the Checksums session
- verify the checksum, e.g.
sha256sum <iso file> | grep <checksum from the download page> - use
lsblkto identify the target device, it is e.g.sdc - write the image:
cat <iso file> > /dev/<target device>
Install
- boot into the bootable USB device
- disable PC speaker:
rmmod pcspkr - check the network connection:
ping archlinux.org - use
fdisk -lto identify the target device , it will be e.g./dev/sda - start the disk partitionig:
fdisk /dev/<target> - for a new partition, enter the
ncommand and accept the defaults (this will create one single partition occupying the whole disk) - use the
wcommand to accept the changes - now, our root partition will be e.g.
sda1 - create the new file system:
mkfs.ext4 /dev/<root partition> - mount the root partition:
mount /dev/<root partition> /mnt - install packages:
pacstrap -K /mnt base linux linux-firmware vim - generate fstab:
genfstab -U /mnt >> /mnt/etc/fstab - edit
/mnt/etc/fstab:- change
relatimetonoatime - add a new line creating using a ramdisk for
/tmp:
- change
tmpfs /tmp tmpfs rw,nodev,nosuid,size=2G 0 0- chroot into the target filesystem:
arch-chroot /mnt - set the time zone:
ln -sf /usr/share/zoneinfo/Europe/Bratislava /etc/localtime - generate adjtime:
hwclock --systohc - uncomment
en_US.UTF-8 UTF-8in/etc/locale.gen - generate locales:
locale-gen - create locale.conf:
echo LANG=en_US.UTF-8 > /etc/locale.conf - set hostname:
echo <hostname> > /etc/hostname - install dhcpcd:
pacman -S dhcpcd - enable dhcpcd:
systemctl enable dhcpcd - disable PC speaker:
echo "blacklist pcspkr" > /etc/modprobe.d/nobeep.conf - create root password using
passwd - install syslinux packages:
pacman -S syslinux - install boot loader:
syslinux-install_update -i -a -m - edit
/boot/syslinux/syslinux.cfg:- check APPEND lines - a coorect root partition should be specified, e.g. by
root=/dev/disk/by-uuid/<uuid>- obtain UUID from/etc/fstab - for the first entry (
LABEL arch) specifyquiet(separated by space) at the end of theAPPENDline - set
TIMEOUTto10to immediately boot the first entry
- check APPEND lines - a coorect root partition should be specified, e.g. by
exitreboot
Create a regular user
- create user:
# useradd -m user1 - create password:
# passwd user1
Graphical environment, launcher, terminal, browser
- install packages:
# pacman -S xorg nvidia xorg-xinit openbox gmrun kitty chromium - use openbox:
$ echo "exec openbox-session" > ~/.xinitrc - create user’s openbox configuration:
mkdir -p ~/.config; cp -r /etc/xdg/openbox/ ~/.config/ - add keyboard shortcuts - edit
~/.config/openbox/rc.xml, the<keyboard>section:- remove unused or conflicting bindings:
W-F1,W-F2,W-F3,W-F4,W-e - add:
- remove unused or conflicting bindings:
<keybind key="W-R"><action name="Execute">
  <command>gmrun</command>
</action></keybind>

<keybind key="W-Return"><action name="Execute">
  <command>kitty</command>
</action></keybind>

<keybind key="W-F3"><action name="Execute">
  <command>chromium</command>
</action></keybind>- now we can use
$ startxto start the graphical environment and then these shortcuts:Win+Rfor application launcherWin+Enterfor terminalWin+F3for browser
- note that for some later configuration changes to take effect, openbox must be reconfigured or restarted (e.g. right click on the desktop, select “Log Out” and then do
startxagain)
Additional terminal configuration
- edit
~/.config/kitty/kitty.conf - for copy-paste using
Ctrl+CandCtrl+V:
map ctrl+c copy_or_interrupt
map ctrl+v paste_from_clipboard- appearance:
foreground #000000
background #ffffff
selection_foreground #ffffff
selection_background #000000
cursor #ff0000
cursor_blink_interval 0- disable audio bell:
enable_audio_bell noConfigure AUR
- install development tools:
# pacman -S base-devel git go - download yay: https://aur.archlinux.org/packages/yay (use “Download snapshot”)
- extract:
$ tar xf yay.tar.gz; cd yay - build:
$ makepkg - install:
# pacman -U yay-11.3.1-1-x86_64.pkg.tar.zst - allow using sudo to execute commands issued by yay as root - edit
/etc/sudoers.d/user1yay:
user1 ALL = /usr/bin/pacman -S *
user1 ALL = /usr/bin/pacman -D -q --asdeps --config /etc/pacman.conf -- *
user1 ALL = /usr/bin/pacman -U --noconfirm --config /etc/pacman.conf -- *
user1 ALL = /usr/bin/pacman -R -u --noconfirm --config /etc/pacman.conf -- *
File manager
$ yay far2l-git- allow using sudo to execute commands issued by far as root - edit
/etc/sudoers.d/user1far:
user1 ALL = /usr/lib/far2l/far2l_sudoapp *- add keyboard shortcut to far - edit
~/.config/openbox/rc.xmland add to<keyboard>section:
<keybind key="W-F1"><action name="Execute">
  <command>nohup far2l --notty</command>
</action></keybind>- now we can use these shortcuts:
Win+F1for file manager
Text editor
- install:
$ yay visual-studio-code-bin - add keyboard shortcuts - edit
~/.config/openbox/rc.xmland add to<keyboard>section:
<keybind key="W-F2"><action name="Execute">
  <command>code</command>
</action></keybind>- now we can use these shortcuts:
Win+F2for text editor
Keyboard
- set keyboard repeat rate:
- add to the beginning of
~/.xinitrc:
- add to the beginning of
xset r rate 200 25- enable NumLock at startup:
# pacman -S numlockx- add to the beginning of
~/.xinitrc:
numlockx &- disable annoying keys:
- add to the beginning of
~/.xinitrc:
- add to the beginning of
xmodmap -e 'keycode 77 = NoSymbol Num_Lock'
xmodmap -e 'keycode 66 = NoSymbol Caps_Lock'- add keyboard shortcuts to switch keyboard layouts - edit
~/.config/openbox/rc.xmland add to<keyboard>section:
<keybind key="W-Z"><action name="Execute">
  <command>setxkbmap us</command>
</action></keybind>

<keybind key="W-X"><action name="Execute">
  <command>setxkbmap sk -variant qwerty</command>
</action></keybind>- now we can use these shortcuts:
Win+Zfor US layoutWin+Xfor SK layout
Menu
- edit
~/.config/openbox/menu.xml:
<?xml version="1.0" encoding="UTF-8"?>

<openbox_menu xmlns="http://openbox.org/3.4/menu">

  <menu id="root-menu" label="Openbox 3">
    <item label="Reconfigure Openbox">
      <action name="Reconfigure" />
    </item>
    <item label="Suspend">
      <action name="Execute">
        <command>systemctl suspend</command>
      </action>
    </item>
    <item label="Reboot">
      <action name="Execute">
        <command>systemctl reboot</command>
      </action>
    </item>
    <item label="Shutdown">
      <action name="Execute">
        <command>systemctl poweroff</command>
      </action>
    </item>
    <item label="Log Out">
      <action name="Exit">
        <prompt>yes</prompt>
      </action>
    </item>
  </menu>

</openbox_menu>
Panel (taskbar)
- install:
# pacman -S tint2 - add to the end of
~/.config/openbox/autostart:
tint2 &- configure using:
$ tint2conf - example resulting
~/.config/tint2/tint2rc:
#---- Generated by tint2conf b6a1 ----
# See https://gitlab.com/o9000/tint2/wikis/Configure for
# full documentation of the configuration options.
#-------------------------------------
# Gradients
#-------------------------------------
# Backgrounds
# Background 1: Panel
rounded = 0
border_width = 0
border_sides = TBLR
border_content_tint_weight = 0
background_content_tint_weight = 0
background_color = #000000 60
border_color = #000000 30
background_color_hover = #000000 60
border_color_hover = #000000 30
background_color_pressed = #000000 60
border_color_pressed = #000000 30

# Background 2: Default task, Iconified task
rounded = 4
border_width = 1
border_sides = TBLR
border_content_tint_weight = 0
background_content_tint_weight = 0
background_color = #777777 20
border_color = #777777 30
background_color_hover = #aaaaaa 22
border_color_hover = #eaeaea 44
background_color_pressed = #555555 4
border_color_pressed = #eaeaea 44

# Background 3: Active task
rounded = 4
border_width = 1
border_sides = TBLR
border_content_tint_weight = 0
background_content_tint_weight = 0
background_color = #777777 20
border_color = #ffffff 40
background_color_hover = #aaaaaa 22
border_color_hover = #eaeaea 44
background_color_pressed = #555555 4
border_color_pressed = #eaeaea 44

# Background 4: Urgent task
rounded = 4
border_width = 1
border_sides = TBLR
border_content_tint_weight = 0
background_content_tint_weight = 0
background_color = #aa4400 100
border_color = #aa7733 100
background_color_hover = #cc7700 100
border_color_hover = #aa7733 100
background_color_pressed = #555555 4
border_color_pressed = #aa7733 100

# Background 5: Tooltip
rounded = 1
border_width = 1
border_sides = TBLR
border_content_tint_weight = 0
background_content_tint_weight = 0
background_color = #222222 100
border_color = #333333 100
background_color_hover = #ffffaa 100
border_color_hover = #000000 100
background_color_pressed = #ffffaa 100
border_color_pressed = #000000 100

#-------------------------------------
# Panel
panel_items = TSCB
panel_size = 100% 30
panel_margin = 0 0
panel_padding = 2 0 2
panel_background_id = 1
wm_menu = 0
panel_dock = 0
panel_pivot_struts = 0
panel_position = bottom center horizontal
panel_layer = top
panel_monitor = all
panel_shrink = 0
autohide = 1
autohide_show_timeout = 0
autohide_hide_timeout = 0.5
autohide_height = 2
strut_policy = minimum
panel_window_name = tint2
disable_transparency = 1
mouse_effects = 1
font_shadow = 0
mouse_hover_icon_asb = 100 0 10
mouse_pressed_icon_asb = 100 0 0
scale_relative_to_dpi = 0
scale_relative_to_screen_height = 0

#-------------------------------------
# Taskbar
taskbar_mode = single_desktop
taskbar_hide_if_empty = 0
taskbar_padding = 0 0 2
taskbar_background_id = 0
taskbar_active_background_id = 0
taskbar_name = 1
taskbar_hide_inactive_tasks = 0
taskbar_hide_different_monitor = 0
taskbar_hide_different_desktop = 0
taskbar_always_show_all_desktop_tasks = 0
taskbar_name_padding = 4 2
taskbar_name_background_id = 0
taskbar_name_active_background_id = 0
taskbar_name_font = Cantarell 13
taskbar_name_font_color = #e3e3e3 100
taskbar_name_active_font_color = #ffffff 100
taskbar_distribute_size = 0
taskbar_sort_order = none
task_align = left

#-------------------------------------
# Task
task_text = 1
task_icon = 1
task_centered = 1
urgent_nb_of_blink = 100000
task_maximum_size = 150 35
task_padding = 2 2 4
task_font = Cantarell 12
task_tooltip = 1
task_thumbnail = 0
task_thumbnail_size = 210
task_font_color = #ffffff 100
task_background_id = 2
task_active_background_id = 3
task_urgent_background_id = 4
task_iconified_background_id = 2
mouse_left = toggle_iconify
mouse_middle = none
mouse_right = close
mouse_scroll_up = toggle
mouse_scroll_down = iconify

#-------------------------------------
# System tray (notification area)
systray_padding = 0 4 2
systray_background_id = 0
systray_sort = ascending
systray_icon_size = 24
systray_icon_asb = 100 0 0
systray_monitor = 1
systray_name_filter =

#-------------------------------------
# Launcher
launcher_padding = 2 4 2
launcher_background_id = 0
launcher_icon_background_id = 0
launcher_icon_size = 24
launcher_icon_asb = 100 0 0
launcher_icon_theme_override = 0
startup_notifications = 1
launcher_tooltip = 1
launcher_item_app = tint2conf.desktop
launcher_item_app = firefox.desktop
launcher_item_app = iceweasel.desktop
launcher_item_app = chromium-browser.desktop
launcher_item_app = google-chrome.desktop

#-------------------------------------
# Clock
time1_format = %Y-%m-%d %H:%M
time2_format =
time1_font = Cantarell 14
time1_timezone =
time2_timezone =
clock_font_color = #ffffff 100
clock_padding = 2 0
clock_background_id = 0
clock_tooltip =
clock_tooltip_timezone =
clock_lclick_command =
clock_rclick_command = orage
clock_mclick_command =
clock_uwheel_command =
clock_dwheel_command =

#-------------------------------------
# Battery
battery_tooltip = 1
battery_low_status = 10
battery_low_cmd = xmessage 'tint2: Battery low!'
battery_full_cmd =
battery_font_color = #ffffff 100
bat1_format =
bat2_format =
battery_padding = 1 0
battery_background_id = 0
battery_hide = 101
battery_lclick_command =
battery_rclick_command =
battery_mclick_command =
battery_uwheel_command =
battery_dwheel_command =
ac_connected_cmd =
ac_disconnected_cmd =

#-------------------------------------
# Tooltip
tooltip_show_timeout = 0.5
tooltip_hide_timeout = 0.1
tooltip_padding = 4 4
tooltip_background_id = 5
tooltip_font_color = #dddddd 100
Network manager
- service:
- install:
# pacman -S networkmanager - start:
# systemctl start NetworkManager - enable:
# systemctl enable NetworkManager
- install:
- tray icon:
- install:
# pacman -S network-manager-applet - add to the end of
~/.config/openbox/autostart:
- install:
nm-applet &Sound
- sound framework:
- install:
# pacman -S pipewire pipewire-alsa pipewire-jack pipewire-pulse
- install:
- mixer
- install:
# pacman -S pavucontrol
- install:
- keyboard shortcuts
- add keyboard shortcuts - edit
~/.config/openbox/rc.xmland add to<keyboard>section:
- add keyboard shortcuts - edit
  <keybind key="XF86AudioMute"><action name="Execute">
    <command>pactl set-sink-mute @DEFAULT_SINK@ toggle</command>
  </action></keybind>

  <keybind key="XF86AudioLowerVolume"><action name="Execute">
    <command>pactl set-sink-volume @DEFAULT_SINK@ -10%</command>
  </action></keybind>

  <keybind key="XF86AudioRaiseVolume"><action name="Execute">
    <command>pactl set-sink-volume @DEFAULT_SINK@ +10%</command>
</action></keybind>- tray icon:
- install:
$ yay pnmixer - add to the end of
~/.config/openbox/autostart:
- install:
pnmixer &- configure the tray icon in
~/.config/pnmixer/config, e.g. (mainly setVolumeControlCommand=pavucontrolandEnableHotKeys=false):
[PNMixer]
SliderOrientation=vertical
DisplayTextVolume=true
TextVolumePosition=0
ScrollStep=5
FineScrollStep=1
MiddleClickAction=0
CustomCommand=
VolMuteKey=-1
VolUpKey=-1
VolDownKey=-1
AlsaCard=(default)
NormalizeVolume=true
SystemTheme=false
DrawVolMeter=false
VolMeterPos=0
VolMeterColor=0.9097900390625;0.431365966796875;0.431365966796875;
VolumeControlCommand=pavucontrol
EnableHotKeys=false
VolMuteMods=0
VolUpMods=0
VolDownMods=0
EnableNotifications=false
HotkeyNotifications=true
MouseNotifications=true
PopupNotifications=false
ExternalNotifications=false
NotificationTimeout=1500

[(default)]
Channel=Master
Removable media manager
- install:
# pacman -S udiskie - add to the end of
~/.config/openbox/autostart:
udiskie --tray --no-automount --file-manager "nohup far2l --notty -cd" --terminal "kitty" &Multiple monitors
- install:
# pacman -S arandr
<keybind key="W-P"><action name="Execute">
  <command>arandr</command>
</action></keybind>- now we can use these shortcuts:
Win+Pfor monitor layout configuration
- to set up a default configuration on stratup, add to the beginning of
~/.xinitrc, e.g.:
xrandr --output DP-0 --primary
xrandr --output DP-1 --right-of DP-0
Screen locking
- install:
# pacman -S xlockmore - add keyboard shortcuts - edit
~/.config/openbox/rc.xmland add to<keyboard>section:
<keybind key="W-L"><action name="Execute">
  <command>xlock -mode blank</command>
</action></keybind>- now we can use these shortcuts:
Win+Lto lock screen
Screenshotting
- install:
# pacman -S scrot - add keyboard shortcuts - edit
~/.config/openbox/rc.xmland add to<keyboard>section:
<keybind key="Print"><action name="Execute">
  <command>scrot</command>
</action></keybind>

<keybind key="W-S-S"><action name="Execute">
  <command>scrot -s</command>
</action></keybind>- now we can use these shortcuts:
PrintScreento create a screenshot of the whole screen (will be saved to ~/)Win+Shift+Sto create a screenshot of the manually selected area (will be saved to ~/)
Calculator
- install:
# pacman -S speedcrunch - add keyboard shortcuts - edit
~/.config/openbox/rc.xmland add to<keyboard>section:
<keybind key="W-F4"><action name="Execute">
  <command>speedcrunch</command>
</action></keybind>- now we can use these shortcuts:
Win+F4for calculator
- configure in
~/.config/SpeedCrunch/SpeedCrunch.ini:
[SpeedCrunch]
Display\ColorSchemeName=Solarized Light
Display\DisplayFont="Sans Serif,12,-1,5,50,0,0,0,0,0"
Special keyboard keys
- add keyboard shortcuts to switch keyboard layouts - edit
~/.config/openbox/rc.xmland add to<keyboard>section:
<keybind key="XF86ScreenSaver"><action name="Execute">
  <command>xlock -mode blank</command>
</action></keybind>

<keybind key="XF86WWW"><action name="Execute">
  <command>chromium</command>
</action></keybind>- get key names using the
xevutility
Written on December 11, 2022